In this quick tutorial, we’ll put together a snazzy London Underground tube line status checker using a Raspberry Pi and Adafruit’s awesome Neopixel LED rings, to recreate the classic Underground roundel! We’ll light up the Neopixel LEDs using the official colours of the Tube lines, allowing you to cycle through your favourite tube lines and get an update on their status with a quick glance! Read on after the break to find out how to put it together!
The idea for this project was actually inspired by a very similar project using a Blinky tape RGB led strip, which does essentially the same thing, except on a long LED strip. That’s why I thought it would be cool to recreate this idea on Adafruit’s Neopixel LED rings, as they very closely match the iconic Underground roundel sign!
What do we need?
- Raspberry Pi (any model should do)
- Adafruit Neopixel LED ring (12 LEDs used in this tutorial, although LED strips will work also)
- A contact push button
- Breadboard and jumper wires
- WiFi module or Ethernet cable for Internet connectivity on your RPi
- 5V power supply (preferably from a standby Arduino board, see below for details)
Wiring it up!
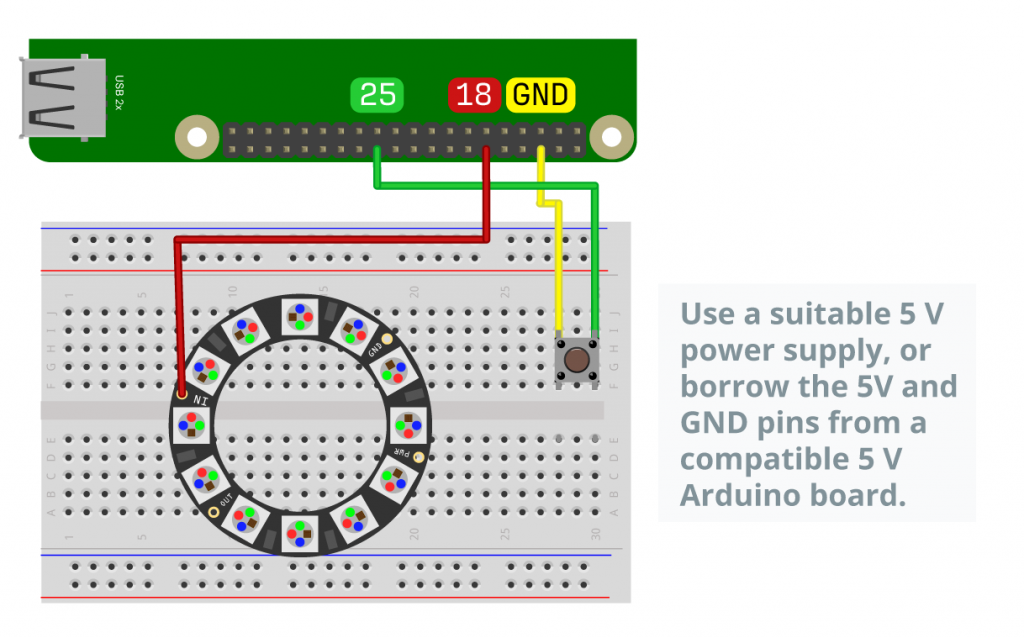
Wiring up this project is simple! We’ll be exploiting Jeremy Garff’s brilliant Neopixel library for the Raspberry Pi, as we did in the Neopixel LED temperature gauge. The tutorial for setting up the library can be found here, and offers two ways of wiring the power supply: either using a level converter chip or a diode. If you have a spare Arduino board, you can just borrows it’s 5V and GND pins, as they’ll have diodes built in as well. Pin 25 has been chosen for the push button, but you may choose any other suitable GPIO pin.

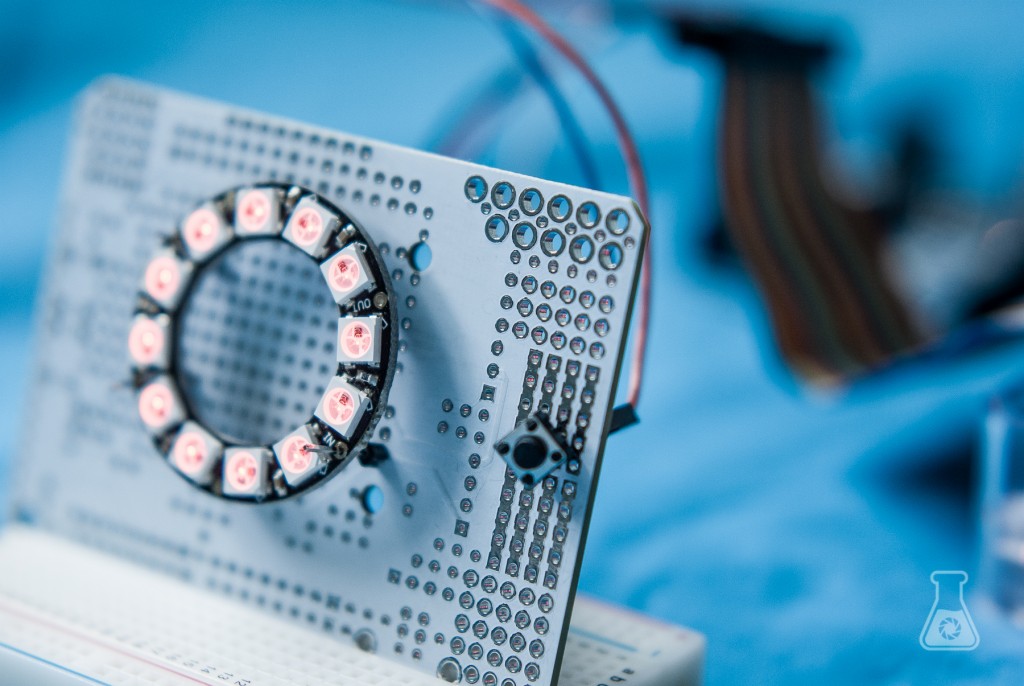
In the schematic above, I’ve shown the wiring on a breadboard, but you can make it a bit more exciting using a prototyping shield such as below. This makes it a bit more easier to observe from a desk or wherever you’d prefer to place it. You can also solder the ring to the shield, to make it a bit more permanent.

The code
As always, I’ve made the code available on my GitHub page. The link to the code is here. Simply download the Python script to your Raspberry Pi, and run the script by typing sudo python underground_status.py at your terminal. Once the script has launched, the current Underground line, whose status is being displayed currently, will be printed at the terminal. Press the push button to cycle between the Underground lines. If a Underground line has reduced service, the ring will light up with a dashed line pattern (i.e. every other LED will light up).
If you’re using a Neopixel strip, or a larger or smaller Neopixel ring, you can still use this script. Simply change the value of the variable on line 8 of the script to the number of Neopixel LEDs in your component!
I hope you’ve enjoyed this quick, but rather cool project! If there are any suggestions or problems, please drop a comment below!

Pingback: Monitor the status of the London Underground with a Raspberry Pi and Neopixels | Raspberry Pi Pod()