
It’s a been a while since I’ve been able to post on my blog, as I’ve been quite busy lately with work in lab. But that doesn’t mean I haven’t been thinking of posts, so here’s a quick tutorial I’ve been planning since weeks, but haven’t had time to write up!
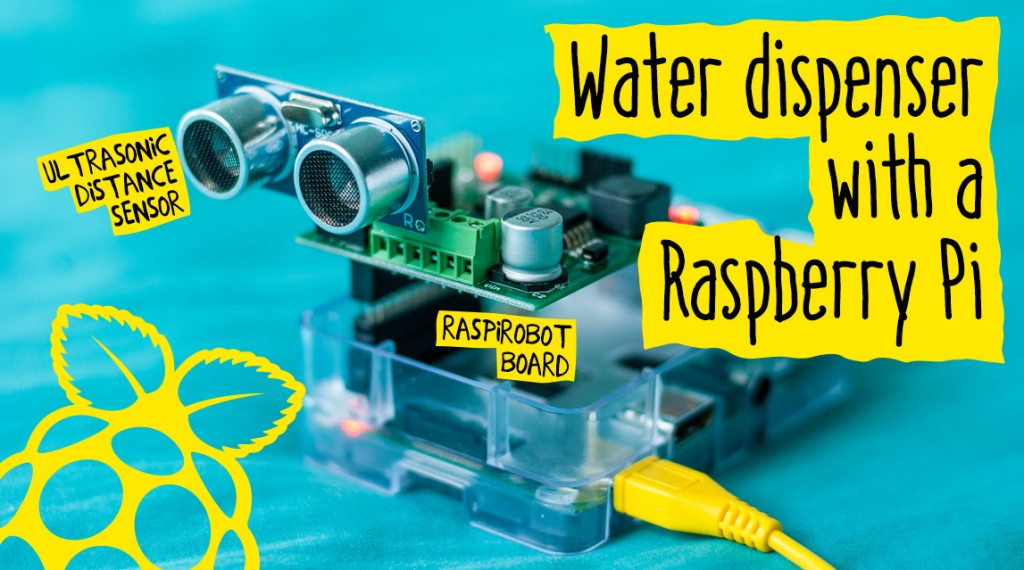
In this quick project, we’ll be using Monk Makes’ RaspiRobot board (v2) and a peristaltic pump, to build a sort of touch free water or drink dispenser. Our main component here, the RaspiRobot board, is a brilliant motor shield you can buy for the Raspberry Pi, which plugs in neatly onto the GPIO header and enables you to control motors effortlessly. Thanks to the simplicity of the Python language and a great module by Monk Makes, writing code to control motors is as simple as typing rr.forward(). The peristaltic pump is another great component for electronics project, which we touched on in our last tutorial on making an automated solution pH adjuster for science labs. These pumps can be bought cheaply on Amazon and in maker stores such as Adafruit, for as little as £10.
What you’ll need
- Raspberry Pi (any model should do, including Pi 2)
- RaspiRobot board v2 (Monk Makes)
- 6V DC Peristaltic pump
- HC-SR-04 ultrasonic rangefinder (link)
- 7.4 V DC battery (recommended) / 9 V DC battery / 6x AA batteries with compartment
Putting it all together
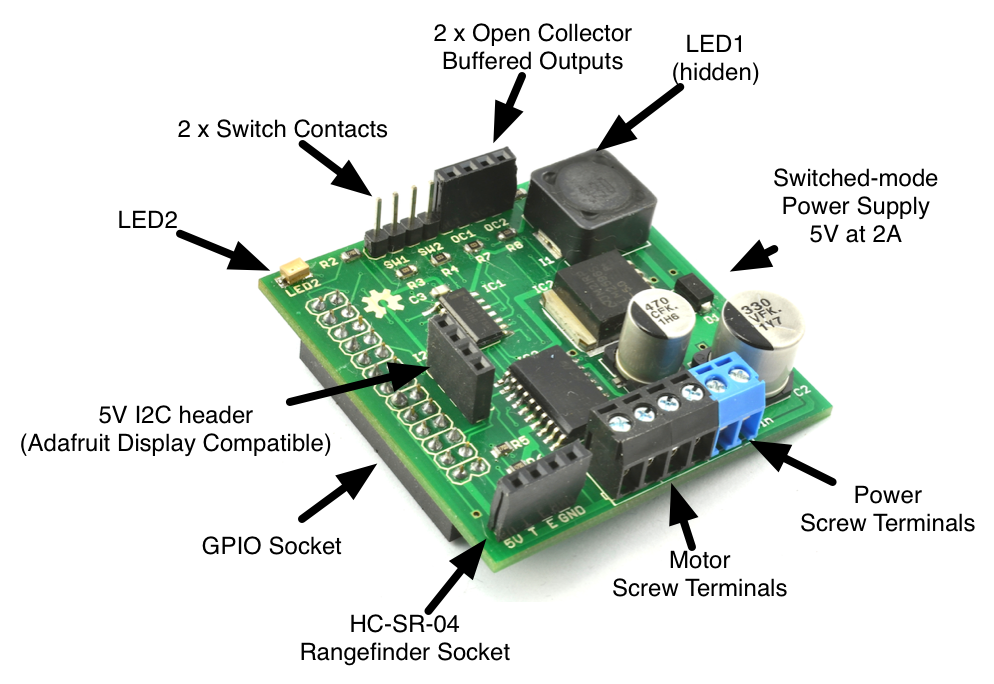
Simply install the RaspiRobot board onto your Raspberry Pi, aligning the pins correctly. The side of the board where the power and motor terminals is should be on the same side of the GPIO header where PIN #1 is, that is towards of the bottom of the Raspberry Pi where typically the micro-SD card slot and power port is. Next, install the ultrasonic sensor on to the RaspiRobot board with it’s sensors facing outwards as in the image at the top (the GND pin should align with the GND pin slot on the board).
Power and motor connections
Whilst making sure the USB power cord isn’t connected to the Pi, hook up your power source to the RaspiRobot board’s power terminals. Never connect both the USB and battery power source at the same time. The diagram below should guide you on how to connect the wires from the negative and positive terminals of the battery source. A 7.4 V DC battery is recommended as these can be found in DSLR batteries, and are of course rechargeable. 9 V DC batteries have a lower capacity, where as 6x AA batteries have greater capacity and are widely and cheaply available. The only downside to AA batteries is finding a compartment to plug them into, from which you can have negative and positive power leads to hook up to the RaspiRobot board. If you try to run this set up of USB power, the 5V over USB will not be sufficient to drive the motor in the pump.
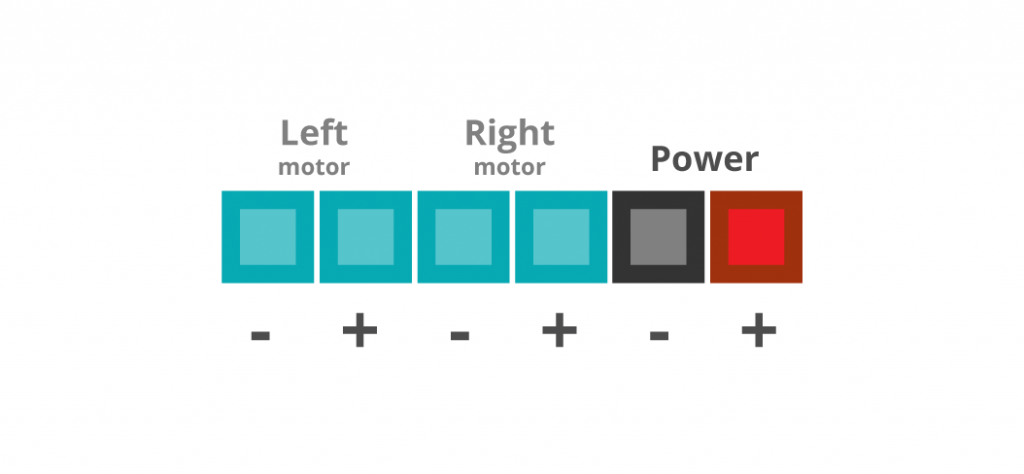
Wiring up the motor is quite simple; there are only two terminals on the back of the motor. Connect one cable from one terminal to one of the positive terminals of one of the motor terminal pairs on the RaspiRobot board, and the other terminal to it’s partner. It doesn’t matter which pair you connect to, both will be activated by the code. The order does not matter either, that is reversing the polarity. If the polarity is wrong, the motor will simply turn the opposite way.
Prerequisites
The last thing to do is install the RaspiRobot board Python module. If your Pi has internet, visit Monk Makes GitHub page and read the instructions on how to install the module. Alternatively, browse to the GitHub page on your computer and download as a ZIP, the files. Extract the files, and copy over the ‘python’ folder to your Pi. Navigate to this folder using your Pi, and open your favourite terminal. Type sudo python setup.py install to install the module.
The code
Create a new file inside your favourite code / text editor, and name it water.py. Copy in the following code:
from rrb2 import *
import time

rr = RRB2() # Initialising module

threshold = 8 # Minimum distance in centimetres
while True:
   dist = rr.get_distance()
   time.sleep(0.5)
   if dist <= threshold:
      rr.forward()
   else:
      rr.stop()
Running the project!
Now all you need to do is connect one end of the tubing from your peristaltic pump into a bottle of your favourite drink or bottle of water, and the other into a glass you’d like to dispense into (you might have them connected the wrong way initially, so a bit of trial and error will be needed here). To run your code, launch a terminal in the directory where your code is saved and type sudo python water.py. To begin dispensing, simply bring your hand in front of the sensor and the pump should begin dispensing. If you find the distance is too long, simply change the value of the threshold variable in the code. There you go, a simple project that takes probably ten minutes to set up, and is quite fun to do! If you have any problems, please drop a comment and I’ll offer you help. Otherwise, any suggestions are appreciated!
Pingback: Touch free water dispenser made with Raspberry Pi #piday #raspberrypi @Raspberry_Pi « Adafruit Industries – Makers, hackers, artists, designers and engineers!()
Pingback: Touch free water dispenser with a Raspberry Pi | Raspberry Pi Pod()
Pingback: Projects you can make | Bip on the Radar()
Pingback: Docker & Raspberry | thecoolestgame()